How to Make a UFO Illustration with Halftones in Adobe Illustrator

How to Make a UFO Illustration with Halftones in Adobe Illustrator

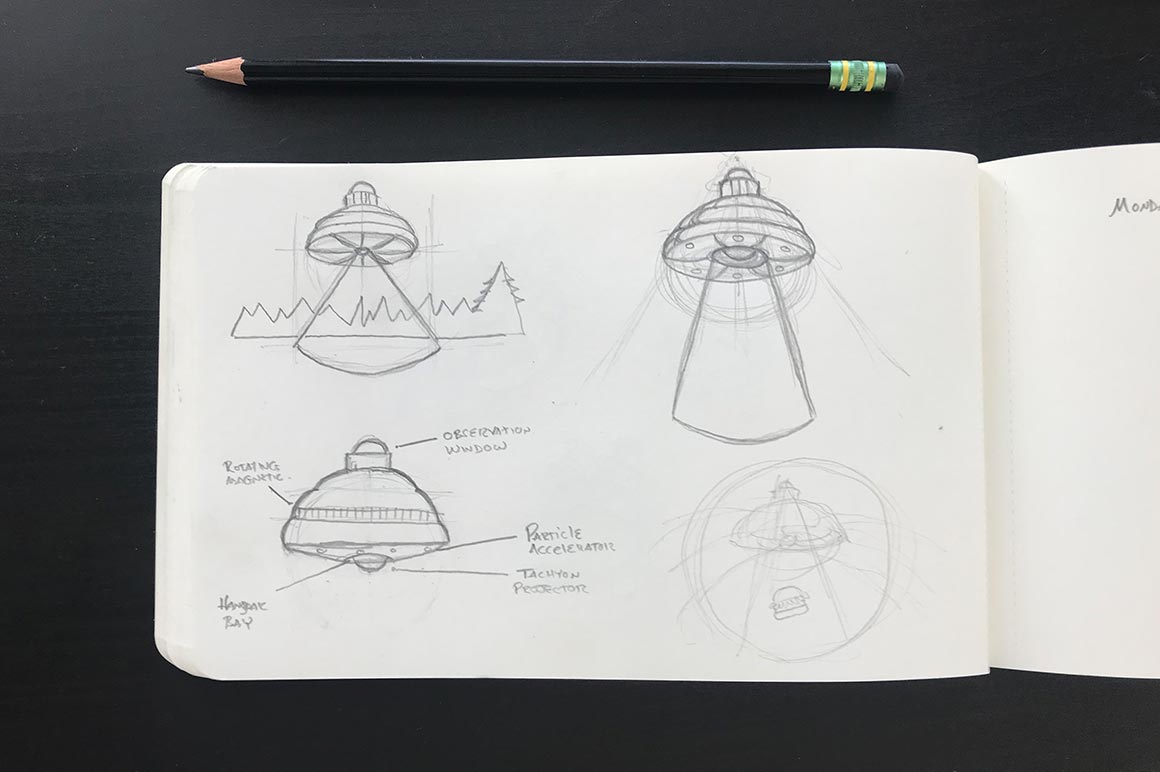
In this tutorial, let's practice incorporating halftones into our artwork by creating an illustration of a UFO abducting a man.

I've always found UFOs to be intriguing. Plus, they're a popular subject in design work for t-shirts, skateboarding culture, and music merch and posters.

Table of Contents

  1. Sketch your ideas
  2. Import your sketch into Illustrator
  3. Build your art by layering shapes
  4. Eliminate lines with the Pathfinder tool
  5. Add details with the Pen Tool
  6. Choose your colors (includes color palette generator)
  7. Add background shading
  8. Add halftone textures
  9. Create a man being abducted

For this project we'll be using our best-selling DupliTone Halftone Brushes for Adobe Illustrator. You may have seen other halftone brushes online — but these take it to another level.

Take a look for yourself and see what you think!

Product in Use
DupliTone Halftone Brushes

Professional quality halftone brushes for Adobe Illustrator. Perfect for seamless layering and shading.

Step 1. Sketch your ideas

Start by working out your ideas in a sketchbook. I used my X-Files "I Want to Believe" poster as well as pictures of UFOs online to inspire my design. I also did a little research on how people have speculated that UFOs operate.

Here are the sketches I made based on my research.

UFO Sketch

Step 2. Import your sketch into Illustrator

Import your sketch into Illustrator. I took a picture of the sketch on my iPhone and brought it into my iMac using Airdrop.

Open Illustrator and create your artboard. I'm using a 1160px by 772px artboard but you can use whatever you want.  

Then I import my sketch into Illustrator using File > Place...

Once I've placed the picture in Illustrator I named the layer Sketch and then locked the layer. This stops my from accidentally selecting and moving it.

Here's how I organize my layers. You can organize your layers in any way you want. I find putting the sketch on the bottom, colors in the middle and line work on the top works well for me.

Layers panel organization

Step 3. Layer shapes with the Ellipses Tool and the Rectangle Tool

I used Illustrator's Ellipse Tool and Rectangle Tool to create shapes and layer them to build the ship.

I'm not worrying about how it looks right now. I'm just trying to build out a basic skeleton that follows my line work.

Here are a few tips for building the shapes out:

    • Hold down Option as you make your circle. This will make it resize from the center out.
    • Use keyboard shortcuts Command+C and Command+F to copy and then place the original ellipses on top of the other. Then hold down shift and drag the copy up and resize it. This keeps everything nicely aligned.
    • Choose a line width as your building. This will help you see how thick the lines are and not be surprised later. I'm using 19pt lines for the major parts of the ship.
Build UFO using simple shapes

Step 4. Use the Pathfinder tool to eliminate overlapping lines

We've built the primary form of the ship. Now it's time to delete unnecessary lines.

Select all of the ellipses and then click Divide in the Pathfinder window (Window > Pathfinder).

Clicking Divide in the Pathfinder window on the selected shapes will break them up wherever they overlap. This allows you to select specific lines and delete them with deleting the entire shape.

Use Pathfinder Tool to delete unnecessary lines

Step 5. Add details with the Pen Tool

The line art for the body of the ship is looking good. Now we need to add the details.

Using the Pen Tool, Line Tool and Shape Tools I've added the following details:

    • Pen Tool to make lines to separate panels on the bottom of the ship.
    • Ellipse to add lights to the bottom of the ship and stars in the sky.
    • Rectangle for the beam of light coming out of the bottom of the ship. I widened the base of the rectangle by individually selecting the bottom right and left points with the Direct Selection Tool and moving them outward.
Add details to UFO with Pen Tool

Step 6. Fill in the colors

Choosing the right color palette for your illustration is essential. Especially in illustrations like this UFO. The light beams, sky, and lights help create the atmosphere.  

I experimented with color palettes using Coolors and various images of UFOs on Google Images.

It's easy to get in the weeds choosing colors. I find it useful to limit my palette. Notice in this illustration I'm really only using four colors and black.

Choose and apply color palette

To get the pale yellow highlights on top of the ship I created two ellipses, layered them on top of each other, selected both ellipses, and then click Minus Front in the Pathfinder Panel. See the animation below.

Use Pathfinder Minus Front

Step 7. Add background shading

I created nested circled by creating one circle (Ellipse Tool while holding Shift+Alt). Then with the circle selected I clicked Command+C to copy the circle and then Command+F to duplicate it on top of the original circle.

Then I made the new circle slightly larger. Then I did the same for each additional circle.

I also created small circles randomly in the background to create stars.

Monochromatic-Colors-UFO-Illustration-Adobe-Illustrator

Step 8. Add halftone textures

This artwork was inspired by The X-Files and low-fi images of UFOs I was looking at. So even though it's a sharp vector Illustration I decided to add some halftone dots to evoke the idea of low-fi images subtly.

I also added halftones to the center of the light beam coming from the UFO. I did this by making a single white line with the Line Segment Tool.

Halftone-Texture-Brushes-Adobe-Illustrator

Step 9. Create a man being captured by UFO

Originally I wasn't going to have the man being captured by the UFO. But the piece didn't really look completely finished. So I decided to give it a try.

I created the man by looking for images of people falling on Google Images. Once I found one that looked promising I imported the image into Illustrator.

I locked the man down using Command+2 and then did a very loose trace of him with the Blob Brush Tool. I focused on making details simple and changing little details like the hair so it would look more like he was being lifted.

Man-Falling-Illustration-Adobe-Illustrator-Tutorial

Finally I just added the floating vector guy on top of the light beam. I made his silhouette black to create a stark contrast between the light from the ship and his body.

Here is the final Illustration:

How to Create a UFO Illustration with Halftone Patterns in Adobe Illustrator

Conclusion: Halftones in Illustrator

Creating vector illustrations doesn't have to be hard. Use the tools in Illustrator to make it simple. It's astounding what can be created by building up shapes, using the Pathfinder tool, choosing colors wisely, and adding textures like halftones tastefully.

Looking for more articles on using halftones like a pro? That's our specialty — check out these articles.